

Creating great designs sometimes requires vector formats to produce full HD designs. This is a type of file format for design graphics. If you are a beginner in graphic design, you will learn how to create and edit vector formats.
So, in this article, you’ll see the basics of creating, viewing, and editing format file vector. Let’s see!
What is a Vector Format File?
Vectors are images made of polygons (a combination of points and lines). You may create it through particular mathematical calculations for making images. Some designers use vectors to create artful illustrations.
Some reasons make vector formats better than other formats. You can change the vector in shape and size without reducing the quality of the graphics. It is suitable for creating files or images you print in large sizes because you can maintain the result.
How to Create Vector Formats?
You can make it yourself if you need a format file vector because it’s easy—no need to make them from scratch. You can create one from an image you have.
Before we start, you will need Photoshop software. Ensure you can learn how to download and install Photoshop on your device. Here is a step-by-step on how to create a format file vector in Photoshop.
1. Choose a Picture
Select the Image you want to make into a vector format. Make sure the Image is in portrait format.
2. Import Your Image
Once you’ve installed Photoshop, import the images into your application. Click “Open” and select the image you want to convert to vector format from your directory. You can also drag and drop your image into the Photoshop application.
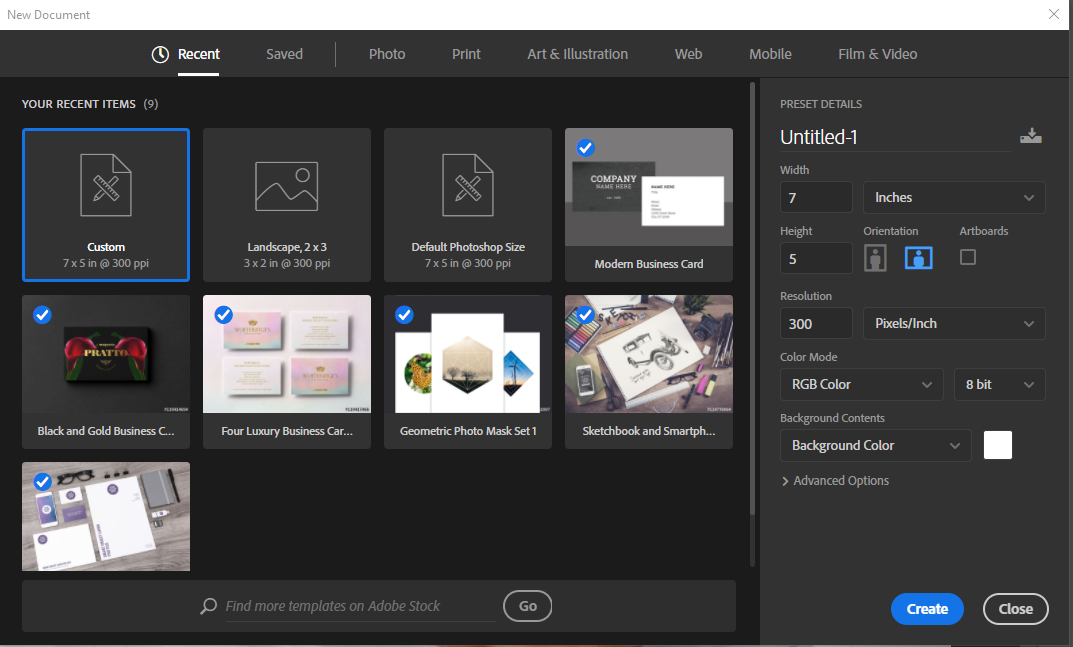
Ensure your image has HD dimensions or above 1080 pixels and give it a resolution greater than or equal to >= 300 Pixels/Inches. Select the Image> Image Size menu or press the shortcut key combination (Ctrl+Alt+I) on the keyboard to do this. Once completed, click OK.
Also Read: What is Monospace Font? Here are Some Well-Known Monospaced Typefaces
3. Select Part of Your Photo Object
Next, you will select the object photo. You can use selection tools like the Pen Tool, Lasso Tool, etc. In addition, you can use the Rectangular Marquee tool if your object is a rectangle.

If you want the part of your picture to have everything in a specific color, use the Magic Wand tool. If you vector an image object, use the Select Subject command.
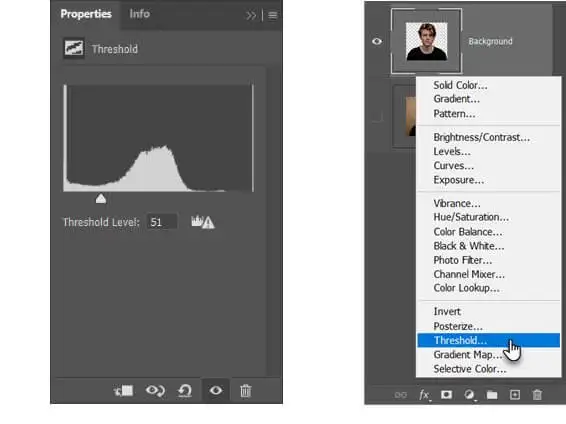
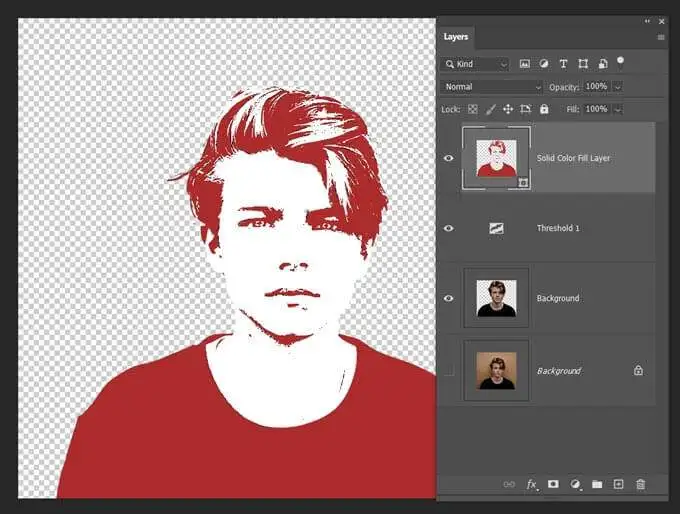
4. Add a Threshold Layer
If you want to convert part of your image selection to a single color, add a new Threshold Layer with the Layers panel, and choose to Create New Fill or Adjustment layer. Select a threshold with the slider, and all parts of the image with pixels that are lighter than that tone will turn white, while all darker pixels will turn black.
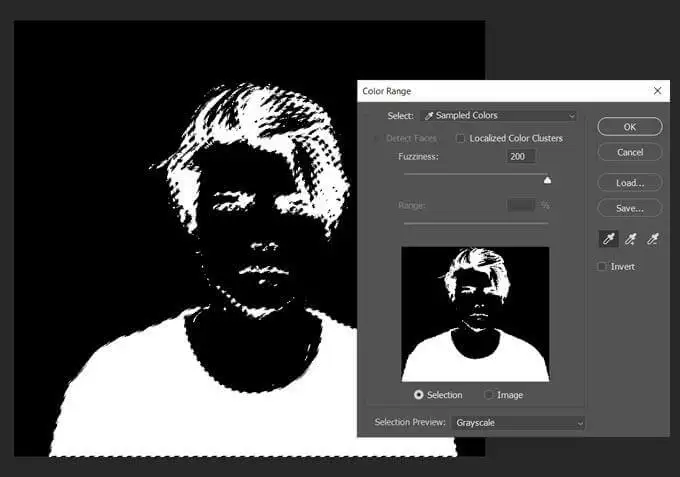
5. Select a Tone Area with the Color Range Command
The next step is to use Color Range to make your selection include all pixels of a similar color. For example, you want to select white or black parts of your Image. It’s an easy way to make a format vector!
Go to Select › Color Range. Then, use the Eyedropper tool to select white or black areas.
Also Read: Transitional Typeface: Definition, History, and Its Characteristics
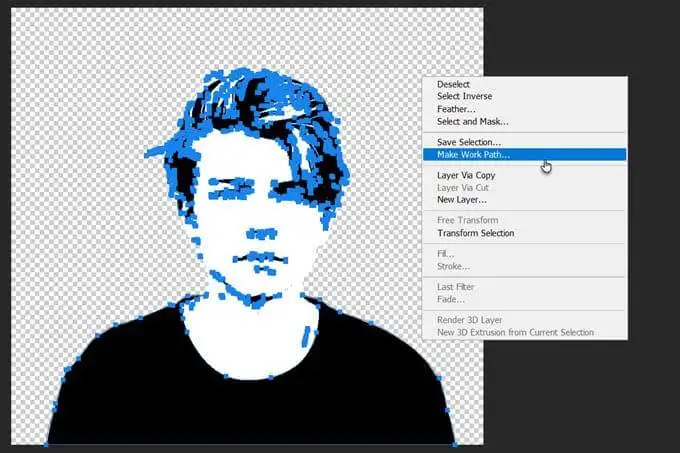
6. Change Your Selection Using Make Work Path
Right-click inside your selection and select Make Work Path to set the tolerance values for your path. The tolerance value determines how much your way should follow the selection contour. The higher the tolerance value, the more appropriate the selected method.
7. Create a Solid Color Layer
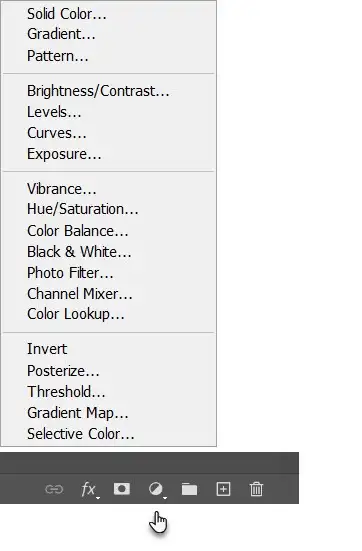
Go to the Layers panel and create a new Fill or Adjustment layer. Choose Solid Color from the menu. This new layer defines the vector shape above the Threshold layer. Therefore, it can be in any color you like.
8. Save Your Work as an SVG file
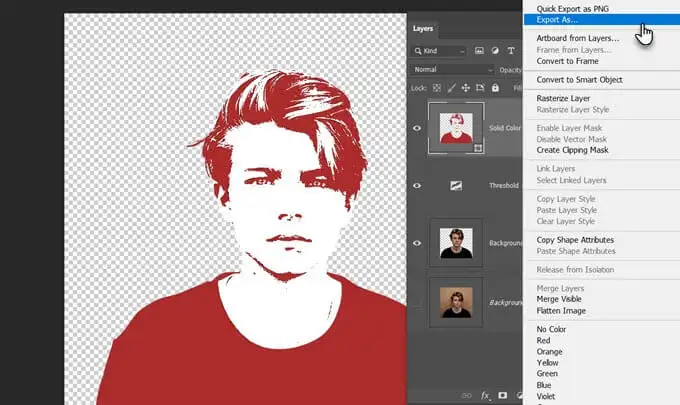
It is the last step you must complete. How? First, right-click on the layer, choose Export As, and select the SVG file. Now, you have a vector file!
Also Read: What Are Script Fonts and How To Apply to Your Design
How to View and Edit a Vector Format File
Some common vector extensions include SVG, AI, EPS, PDF, etc. Use apps like Adobe Reader for PDF files or Photoshop for SVG to view your attachment. If you want to edit, just look back to the tutorial before. It’s pretty similar!
Vector Format for Designing
Vector is excellent for your design because it can produce a high-quality graphic. Everyone may create it as long as they have the software and learn its procedure. So, have you understood the steps? Let’s create your vector format for better design.


