A mockup is a perfect way to display your app or product of your brand. It gives the audience a clear idea regarding your business and convinces your message to the audience. If you’re itching for a quick, easy, and straightforward way to create fine-looking mockups, you can do it using a mockup Canva.
Yep, that’s right. You no longer need Adobe Photoshop, Corel Draw, or other editing software. By utilizing Canva, which has tons of templates and features, you can easily create product mockup designs for your business without any hassle.
Even though it’s easy, you still need some guidance to make your Canva mockup design process much easier. Hence, check out our tips on how to create a mockup Canva below. So, start reading!
What Resources Are Needed to Create Mockup Canva?
Before you take the guidance to create a mockup Canva, it would be great to learn about the resources you need to prepare. When creating a mockup design in Canva, there are two resources you should consider, the Canva account and the relevant image.
A Canva Account
Of course, the first thing is a Canva account. To start designing Canva mockups, you need a Canva account. You can create an account on this platform by signing up using your email, social media, or Apple account. If you successfully sign up, you can start using Canva via mobile or website.
The Relevant Image
Since you will create a mockup design for your product, it is a must that you should prepare relevant images. Photographs, stock photos, graphic design, or even videos are examples of relevant images.
Also Read: Top 10 Combination Fonts Are Unique and Perfect
Tips On How to Create Mockup Canva
When creating a mockup in Canva, there are two methods that you can use to create a mockup with ease. These two methods are:
- Design your mockup using Canva frame
- Use the smart-mockup feature to create your mockup design
Method 1 of Creating Mockup Canva: Using Canva Frame
The first method is the method you can use by utilizing the available Canva frames feature. This method is ideal for creating static mockups for app design and digital products.
In Canva, you can find tons of device frames, such as smartphones, laptops, tablets, and desktops. Not only that, but you also have a large selection of website frames that you can apply to design your mockups.
So how do you create a mockup Canva with Canva frames? Well, here are the steps. Check them out!
Step 1
Login to your Canva account

Step 2
Click the Custom Size button to create a blank template that will contain your frame. You can find the Custom Size button at the top right corner of your screen (for desktop) or at the bottom center of your screen (for mobile).

Step 3
If so, set the dimensions (width and height) depending on your mockup design preferences.

Step 4
Once you have finished setting the dimensions preferences, you can click Create New Design to start creating the mockup.

Step 5
After that, move to the side menu (for desktop) or press the + button (for mobile). You can find the Elements feature there, then click Frames to explore the available Canva frames.

Step 6
You can scroll down to find available Frame templates that match the mockup design you want to create.
Step 7
You can click the frame if you have found the most suitable one. Later, your selected frame will be added to your Canva blank template.

Step 8
Afterward, you can replace the image or design in the frame of your choice with your product photo or video. You can replace and add photo and video products by clicking the Uploads icon and then pressing the Images section.
Those are some easy steps you can apply when creating Canva mockups using Canva frames.
Also Read: 10 Best Funny Fonts to Use on Any of Your Design Projects
Method 2 of Creating Mockup Canva: Utilize the Smart-mockup Feature
The second method is to use a feature or tool called Smartmockups. It is a feature of Canva that has many more options than Canva frames. Through the Smartmockups feature, you can find and get Canva templates to fulfill any mockup design you want to create.
If you want to get more benefits and convenience from the Smartmockups feature, you can upgrade your Canva account to Pro or Premium. You will get more access to templates and advanced editing tools, such as brand kits and background removal tools.
Then how do you create Smartmockups Canva through this Smartmockups feature? Let’s find out through the steps below.
Step 1
Login to your Canva account

Step 2
On the Canva main page, look for the Tools or Apps menu on the side menu. Once there, find and click the Smartmockups feature.

Step 3
Once you do, you will be able to find various mockup templates available. You can keep scrolling down to find the one that best suits your Smartmockups Canva design.

Step 4
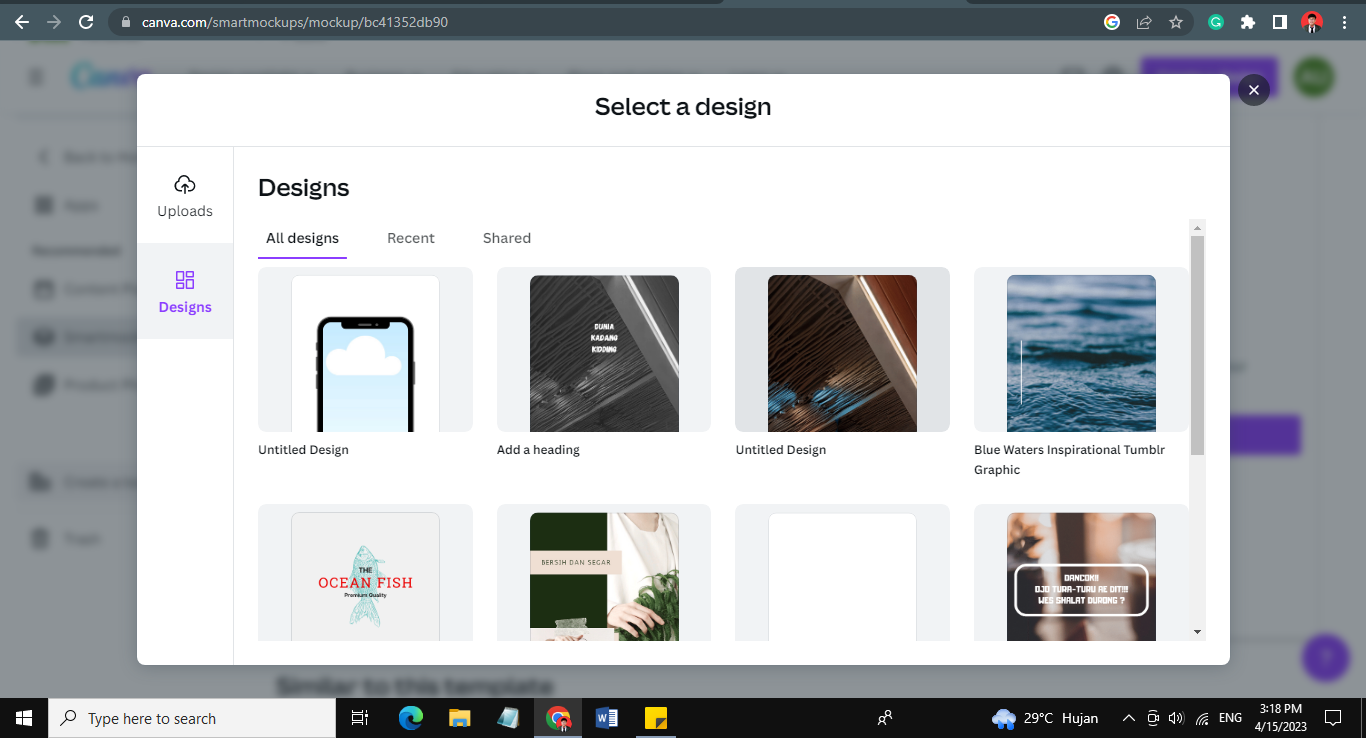
After finding a suitable Smartmockup template, you can click on it and press Select to add photos or videos to your mockup template.

Step 5
Then, you can click the Uploads button to add an image or click the Design button to add a design. It depends on your Canva mockup design preferences.

Step 6
After that, hit the Submit button to integrate the images or design with your mockup template.
Step 7
If so, you can make adjustments to the image or design in your mockup template. How do you do that? Just click Adjust Image.
Step 8
After you have finished making adjustments to your Canva mockup, now is the time for you to click the Save button.
Step 9
You can download your mockup Canva and save it on your device by clicking the Download button. On the other hand, you can also choose to use your Canva mockup for another project by clicking the Use in a Design button.
You can take those steps when creating a mockup Canva using the Smartmockups feature.
Also Read: 9 Most Recommended Thick Fonts That Look Heavy and Chunky
Ready to Create Mockups Easily with Canva?
Canva is one of the editing platforms you can consider because of the various features that can facilitate your design activities. Through this platform, you can create mockups easily because of the various templates available.
Are you looking forward to creating a mockup Canva? If so, apply the method we wrote above properly.


