
Creating a professional presentation of your design often requires more than just displaying flat artwork. That’s where a mockup comes in. Designers and businesses use it to showcase ideas in a more engaging way. Thus, learning how to make a mockup in Photoshop is the first step to achieving that. So, how does it work? Let’s find out!
Key Takeaways
- A Photoshop mockup shows designs realistically with style and detail.
- Smart objects, masks, and blending modes ensure seamless placement.
What Is a Photoshop Mockup?
A mockup is a design model that shows how artwork looks in real life. It emphasizes visual presentation rather than functionality. Unlike sketches, mockups appear polished and professional. Therefore, they are very useful for designers, clients, and businesses.
In contrast, a prototype focuses on testing how something works, while a mockup highlights style, color, and overall appearance. Moreover, Photoshop is widely used because it offers smart objects, effects, and flexible editing tools. As a result, designers can create realistic and customizable mockups efficiently.
7 Steps on How to Make a Mockup in Photoshop Stunningly
To help you get started, we’ll give you a detailed Photoshop mockup tutorial by Quick Fix Up on YouTube through seven simple steps. Follow the steps carefully!
1. Prepare Files and Open in Photoshop
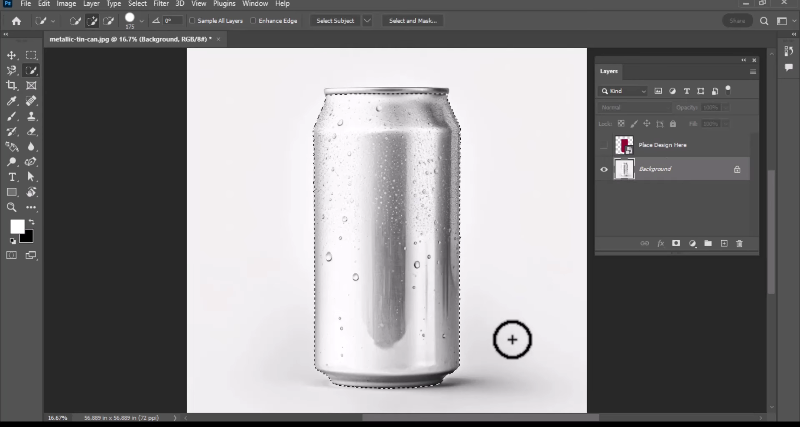
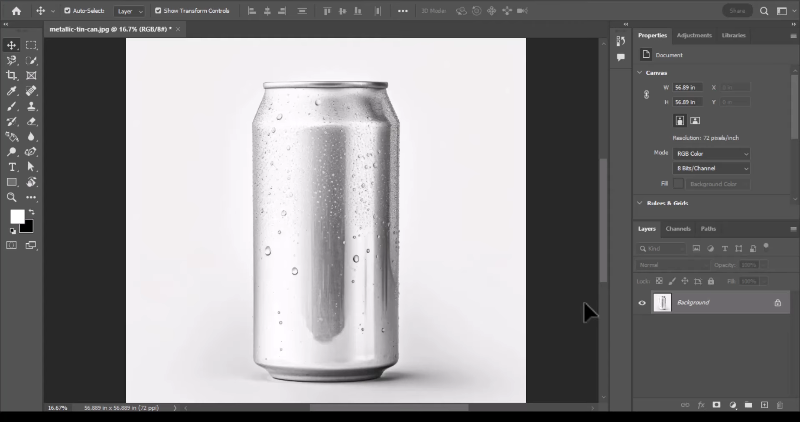 Open the product image in Photoshop | Source: YouTube – Quick Fix Up
Before starting, make sure you have the following: Adobe Photoshop, a product photo (like a metallic tin can), and your design file (logo, label, or artwork). Open the product image in Photoshop and organize your workspace by enabling the Layers panel. A tidy workspace will help you manage layers effectively throughout the process.
Also Read: Will AI Replace Graphic Designers? Unleash Facts and Effects
2. Create the Placement Area with the Rectangle Tool
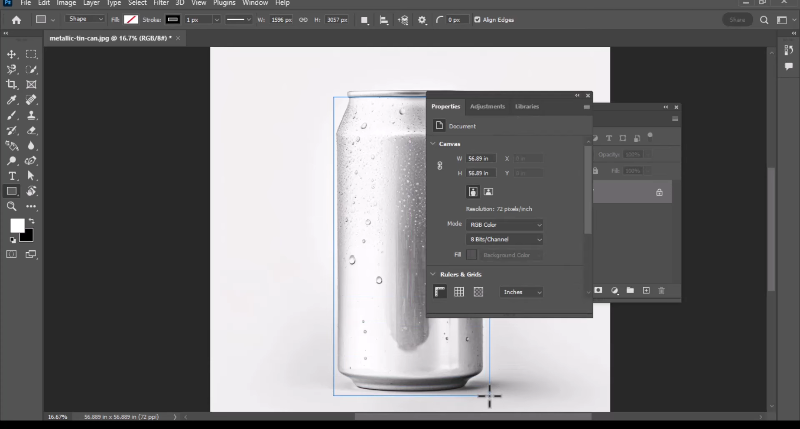 Create the Placement Area with the Rectangle Tool | Source: YouTube – Quick Fix Up
Select the Rectangle Tool and draw a shape over the surface where your design will appear. This rectangle acts as a placeholder for your label or artwork. When learning how to make a mockup in Photoshop, choosing any fill color and setting the stroke to none is a simple but important step.
Next, right-click on the rectangle layer and convert it to a Smart Object, which allows non-destructive editing. Rename the layer to “Place Design Here” to keep everything organized.
3. Warp the Design to Match the Product
 Warp the Design to Match the Product | YouTube – Quick Fix Up
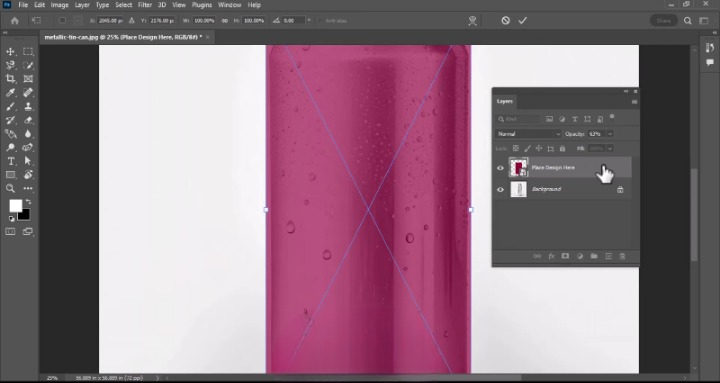
A flat rectangle cannot fit naturally onto a curved surface like a tin can. To fix this, reduce the opacity of the smart object layer so the can image is visible underneath. This will help you align shapes properly.
With the smart object selected, press Ctrl + T to activate Free Transform. Right-click inside the box and choose Warp. Carefully adjust the handles so the rectangle follows the curve of the can realistically.
Take your time with this step because the final mockup depends entirely on the alignment. When the label appears to wrap around the product, press Enter to confirm. Then restore the layer’s opacity back to 100%.
Also Read: Digital Design vs Graphic Design: Choosing the Right Path
4. Mask the Design to Fit the Can
 Mask the Design to Fit the Can | YouTube – Quick Fix Up
The next way on how to make a mockup in Photoshop is turning off the visibility of the smart object layer. Select the Quick Selection Tool and carefully outline the surface of the can where the design should appear. Avoid selecting the lid or bottom edges.
After the selection is ready, turn the smart object layer back on. Group it with Ctrl + G and apply a Layer Mask to the group. This step ensures that the design fits seamlessly onto the chosen surface.
5. Insert and Blend Your Design
 Insert and Blend Your Design | Image Source: YouTube – Quick Fix Up
Double-click on the smart object thumbnail labeled “Place Design Here.” A new window will open. From there, go to File > Place Embedded and select your design file. Adjust its size and position, then save and close.
Back in the main file, change the blending mode of the smart object layer to Linear Burn. This allows your design to absorb the can’s highlights, shadows, and textures. As a result, it will appear more realistic and professional.
Also Read: Designing Using A Vector Graphics Editor: Figma Reviewed
6. Customize the Background
 Customize the Background | YouTube – Quick Fix Up
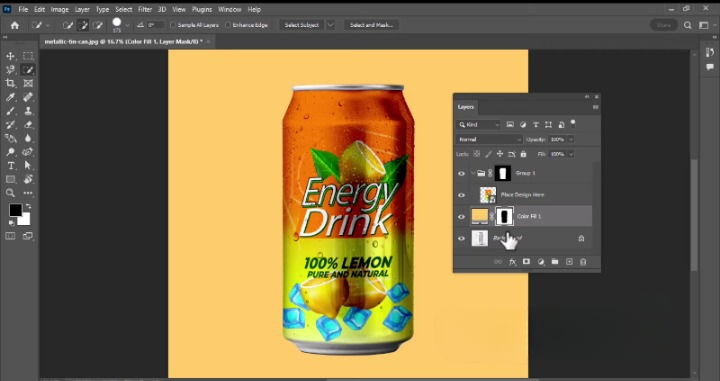
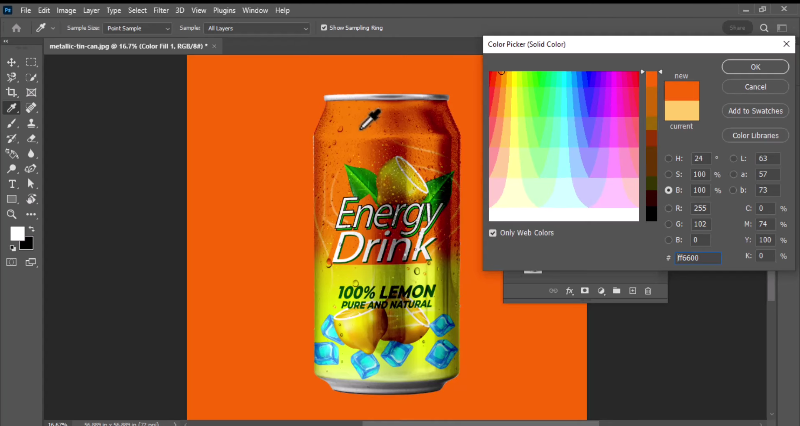
A clean background is mandatory in making a mockup in Photoshop. To do this, hide the group temporarily and select the entire can with the Quick Selection Tool. Then, add a Solid Color Adjustment Layer above the background.
Choose any color you like to replace the background. Next, invert the mask with Ctrl + I so the color only applies to the background and not the can. Set the blending mode to Linear Burn for a smoother, studio-like effect.
7. Add Final Touches and Export
 Add Final Touches and Export | YouTube – Quick Fix Up
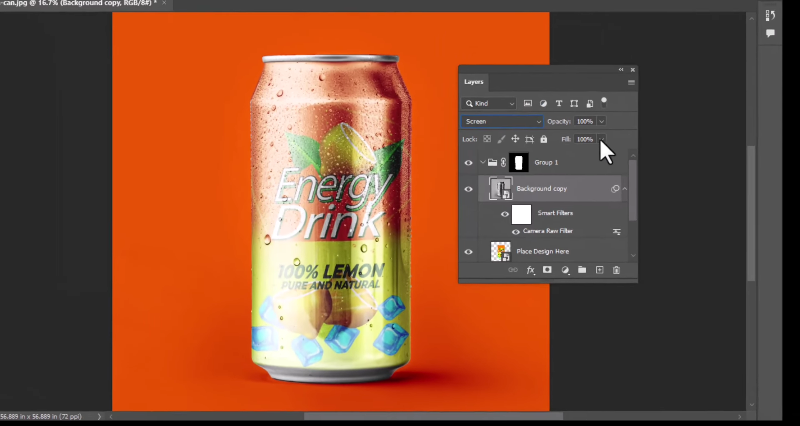
For added realism, duplicate the background layer and convert it into a smart object. Apply the Camera Raw Filter and slightly reduce exposure while increasing whites. This enhances highlights and makes the can vivid.
Then, set the duplicated layer to Screen blending mode and reduce its fill. The lighting will look natural without removing texture. Finally, export the mockup as JPEG or PNG by going to File > Export > Export As.
Also Read: An Innovative Vector Graphics Editor: Sketch Reviewed
Want Realistic Designs? Try Making a Mockup in Photoshop
Now you know exactly how to make a mockup in Photoshop in just seven steps. With smart objects, masks, and blending effects, you can transform a flat design into a realistic product presentation.
Mockups are not just decorative but such useful tools for impressing clients, showcasing creativity, and boosting professional credibility. By practicing these steps, you will master Photoshop mockups and make your designs shine.


