
Procreate is a leading digital art app for iPad, offering powerful tools in a user-friendly interface. It’s perfect for sketching, painting, and animation and ideal for beginners and pros alike. With the right Procreate tips, you can work faster and create better results. So, learning key techniques is a smart move.
Used by artists at Disney, Procreate has cemented its place as a favorite in the creative industry. As more artists go digital, using the app efficiently matters more than ever. Therefore, these tips will help you stay ahead.
Key Takeaways
- Mastering hidden Procreate tips improves workflow speed and creative control.
- Tools like QuickShape and Alpha Lock can create clean, professional artwork.
- Custom gestures and QuickMenu boost productivity for beginners and pros alike.
10 Hidden Procreate Tips That Will Change How You Draw
When you’re just starting out, uncovering these lesser-known tricks can take your work to the next level. Below are 10 hidden Procreate tips for beginners that might just change the way you draw forever.
1. QuickShape
 QuickShape | Image Source: thepigeonletters.com
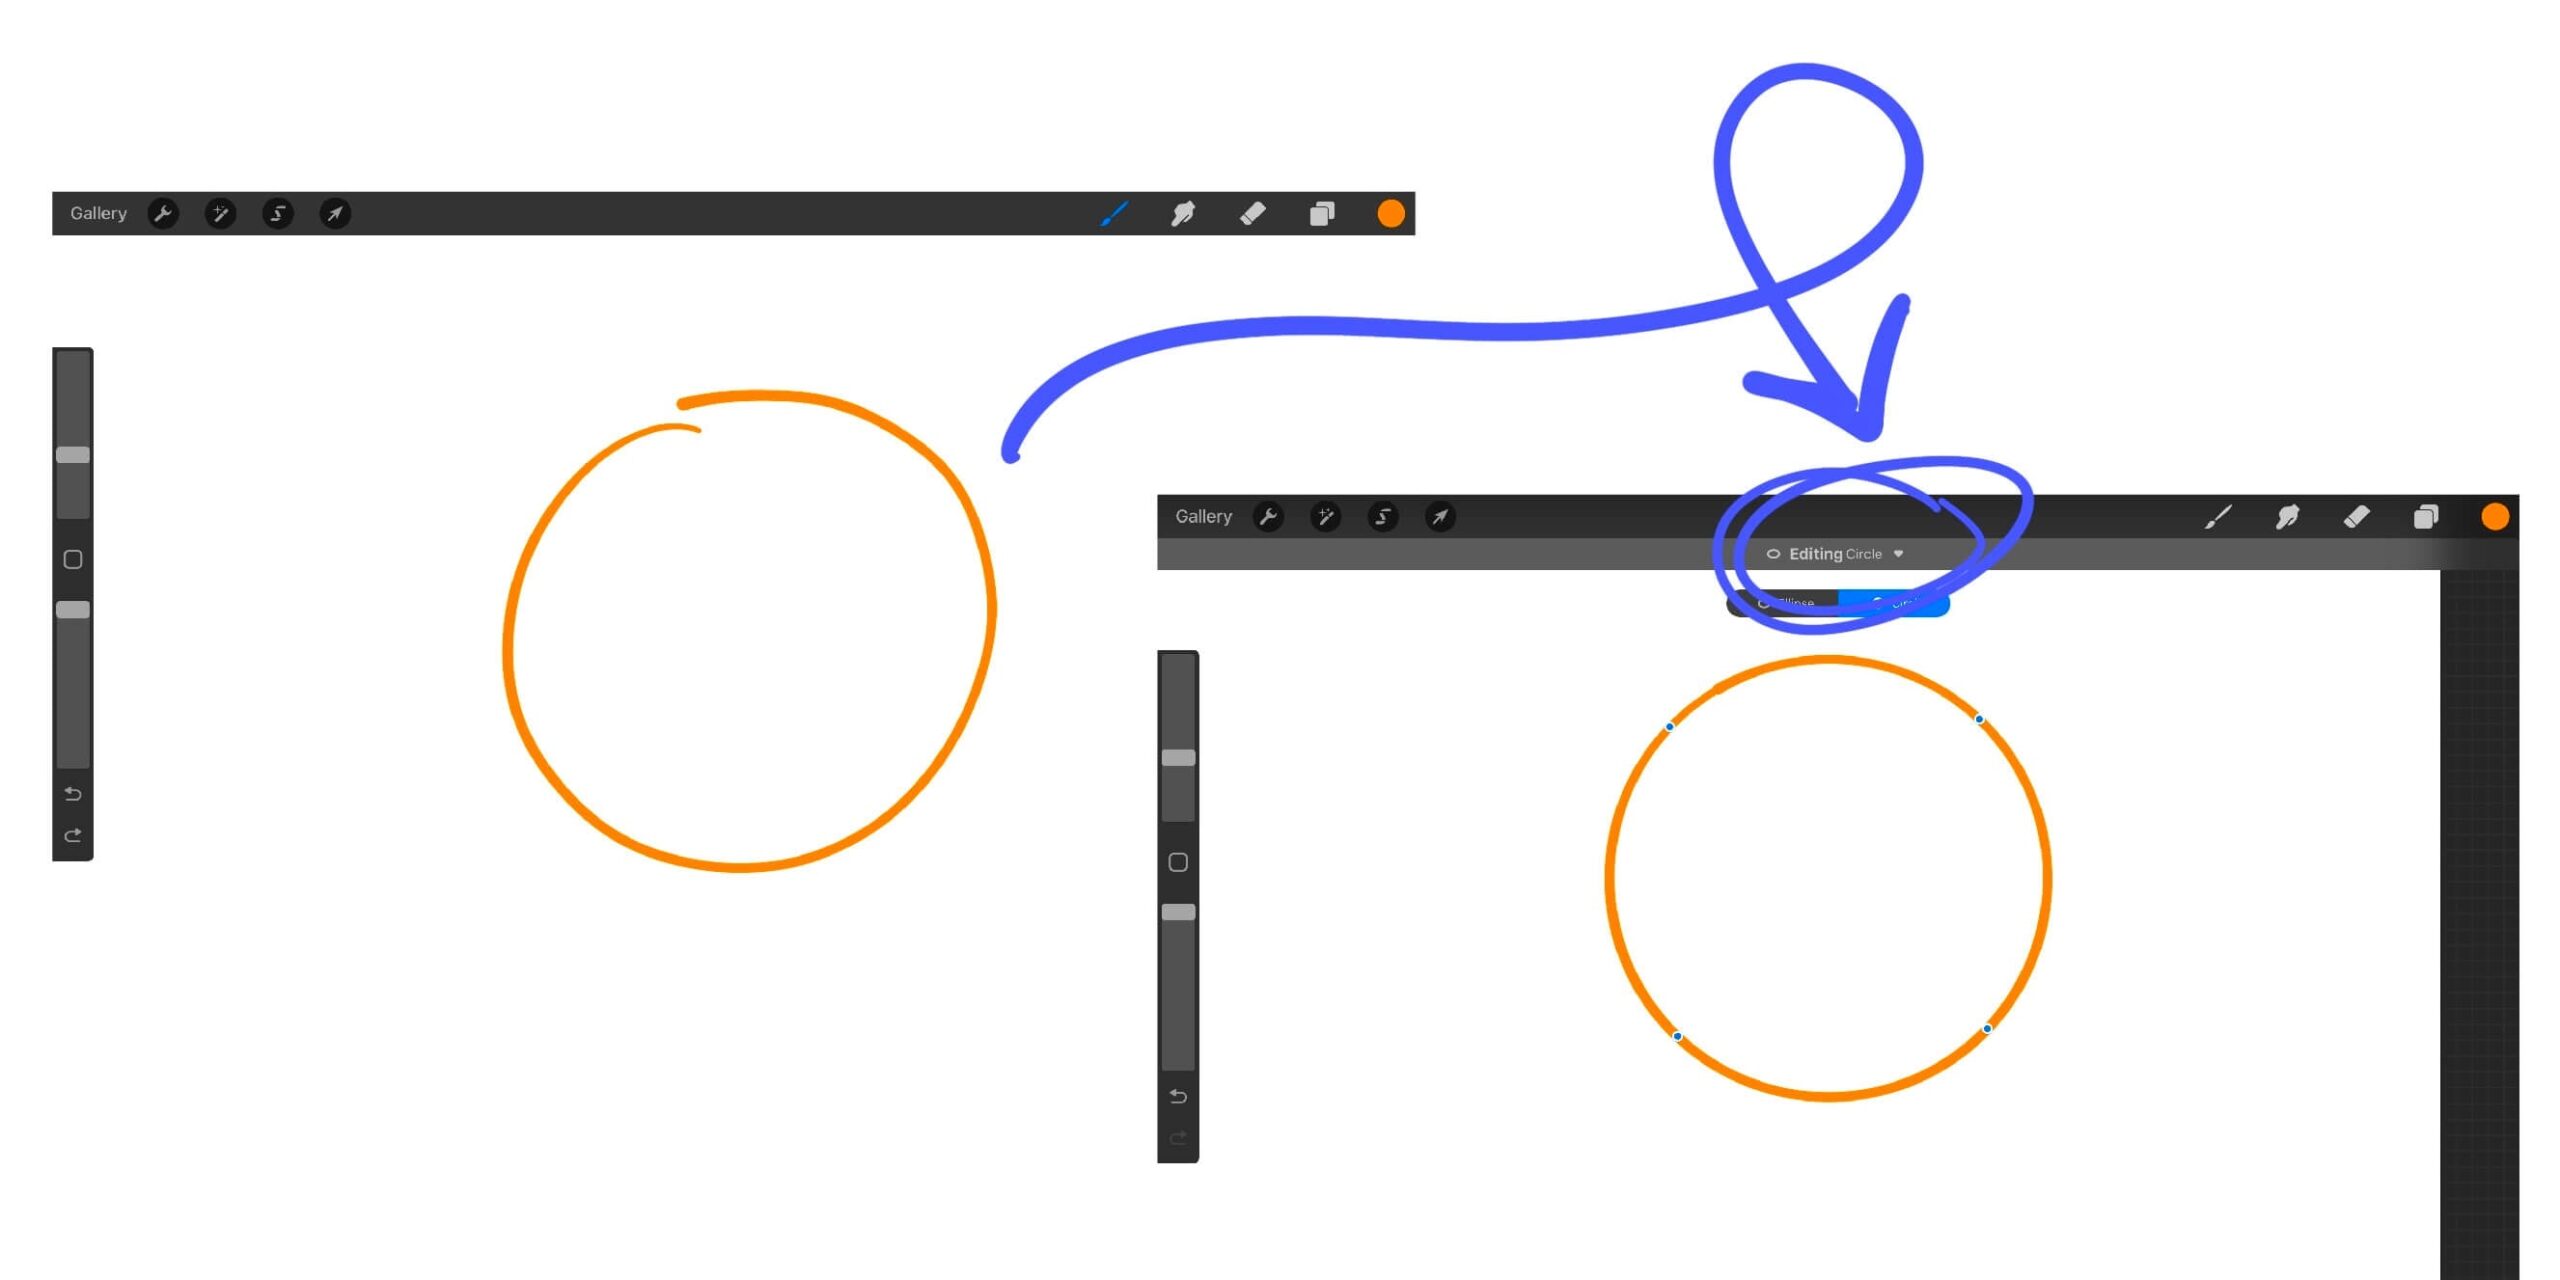
Instead of struggling to draw straight lines or symmetrical shapes, use QuickShape. After drawing a shape or line, simply hold your Apple Pencil on the screen. Procreate will automatically correct your stroke into a clean shape: circle, triangle, or line. If you tap “Edit Shape” before lifting your pencil, you can adjust its size or corners precisely.
Also Read: How to Make Digital Art: 4 Fundamental Steps
2. Gesture Controls
 Gesture Controls | Image Source: makeuseof.com
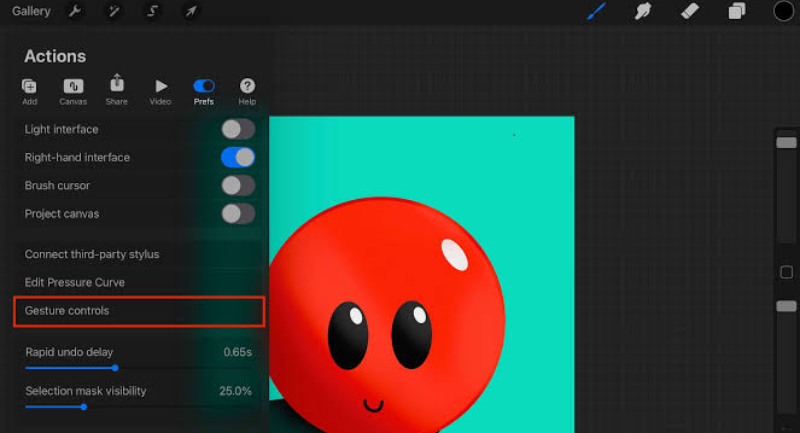
One of the best Procreate tips is using gesture shortcuts to speed up your workflow. Tap with two fingers to undo, three to redo, and pinch to zoom. You can even enter full-screen mode with four fingers. Customize it all under Actions > Prefs > Gesture Controls.
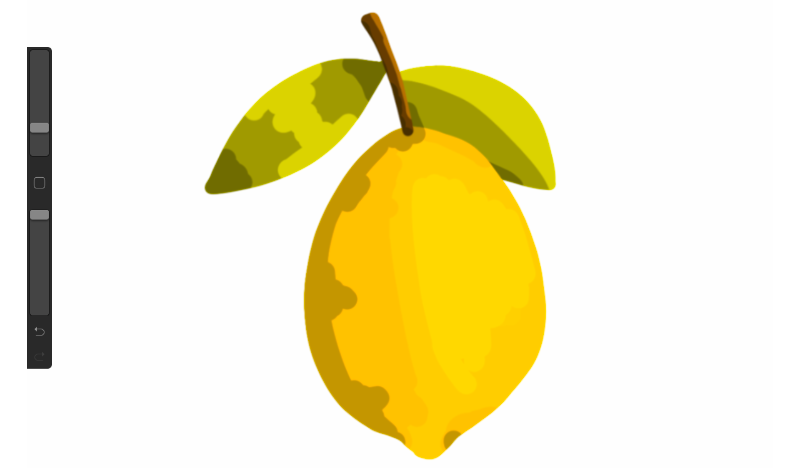
3. Alpha Lock vs Clipping Mask
 Alpha Love vs Mask | Image Source: procreatecourses.com
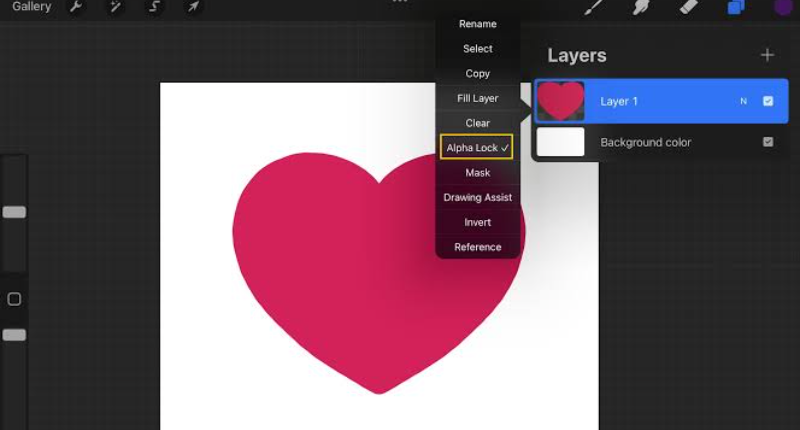
Need to recolor or shade within a shape? Use Alpha Lock to draw only on existing pixels, or try a Clipping Mask for non-destructive shading. These tips offer more control and flexibility. They keep your base layer clean while enhancing your artwork.
4. ColorDrop Threshold for Accurate Fills
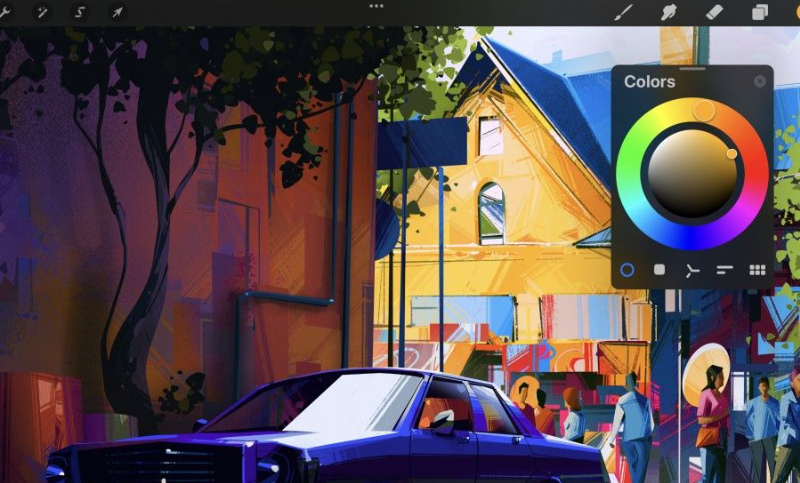 ColorDrop | Image Source: procreate.com
When using the ColorDrop tool to fill areas, hold the color circle and drag it onto your desired space. But here’s the hidden trick: do not lift your finger. Instead, slide it left or right to adjust the fill threshold, which determines how much of the surrounding area gets filled. This is especially useful when working with textured or sketched lines.
Also Read: 8 Best Digital Art Software: Advantages and Disadvantages
5. Hidden Brush Settings for Custom Effects
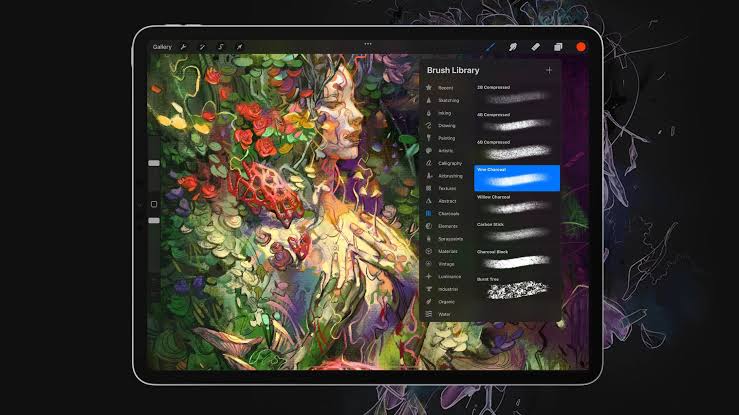 Hidden Brush | Image Source: astropad.com
One of the Procreate tips you have to know is customizing brushes in Brush Studio. Duplicate any brush, then adjust settings like spacing, jitter, or tilt. You can also import custom brushes to match your style. This unlocks more creative control beyond the default tools.
6. Smudge Tool with Any Brush You Want
 Smudge Tool | Image Source: designbundles.com
Did you know the Smudge tool can use any brush in your library? Just tap and hold the Smudge icon, and it will copy your current brush setting. This allows you to blend or texture your artwork using the same brush as your painting tool, creating smoother transitions and more cohesive effects.
7. Reference Companion for Easier Drawing
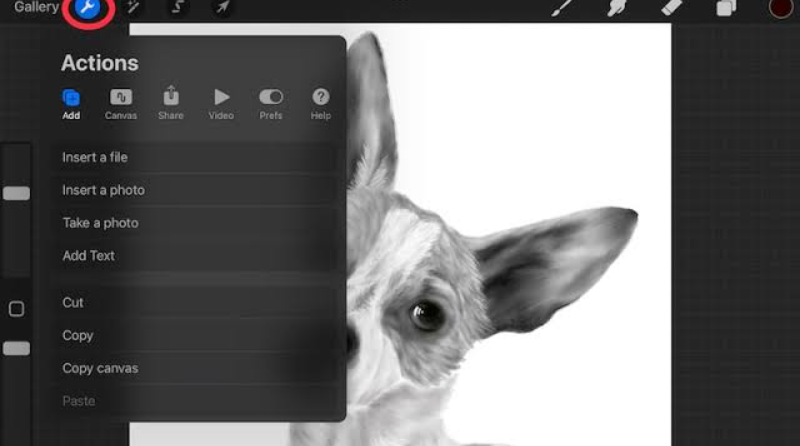 Reference Companion | Image Source: adventureswithart.com
In Procreate 5.2 and later, you can open a Reference Companion window via Actions > Canvas > Reference. This allows you to pin an image, use a live view of your canvas, or even activate face paint mode. It’s especially useful for referencing photos or keeping proportions consistent when sketching characters or scenes.
Also Read: 3 Hacks on How to Sell Digital Art More Effectively
8. QuickMenu
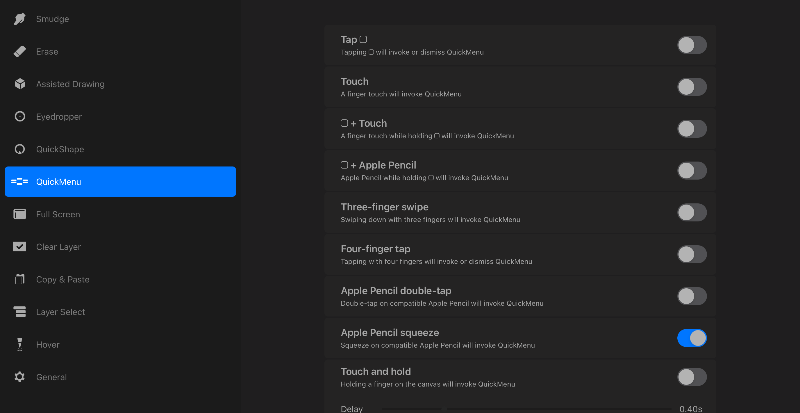 QuickMenu | Image Source: procreate.com
The QuickMenu is one of the most useful Procreate tips for speeding up your workflow. It lets you access up to six custom actions with a simple gesture. Set it up under Gesture Controls to streamline tasks like merging layers or selecting inverses. This keeps your focus on drawing, not digging through menus.
9. Layer Blending Modes for Professional Effects
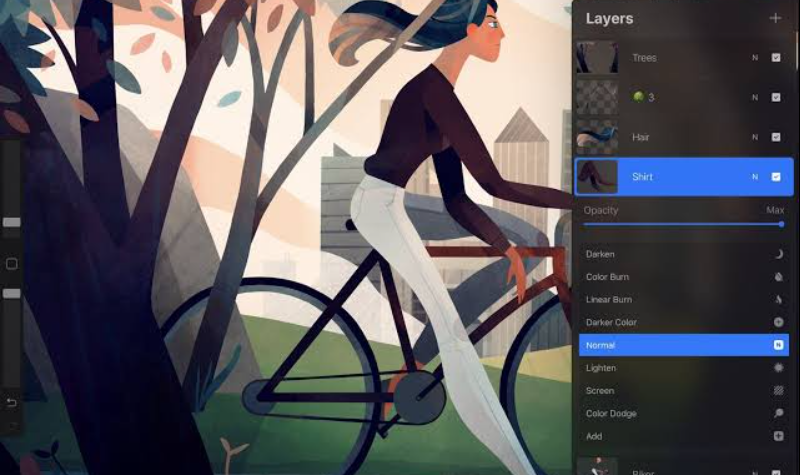 Layer Blending | Image Source: procreate.com
Procreate supports various blending modes like Multiply, Screen, Overlay, and more, similar to Photoshop. Tap the “N” on a layer to experiment with different effects. Use Multiply for shading, Add for glow effects, and Overlay to blend textures. Mastering blending modes can instantly elevate the depth and realism in your artwork.
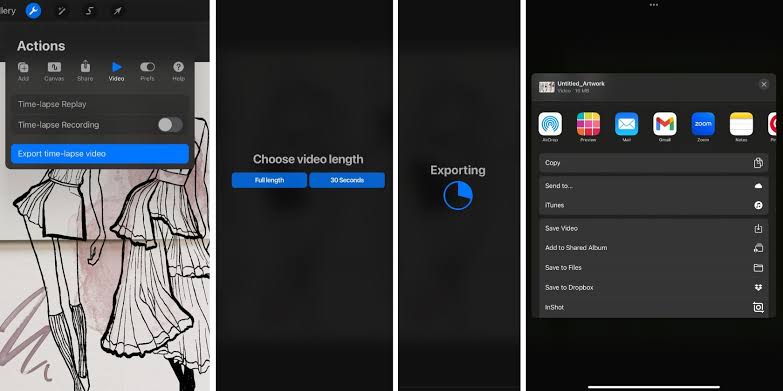
10. Export Time-Lapse for Sharing Process
 Time-lapse | Image Source: makeuseof
Every Procreate project automatically records a time-lapse video of your drawing. Go to Actions > Video > Export Time-lapse Replay to share your process with others or study your own workflow. You can choose between full-length or 30-second versions, which is great for social media, portfolios, or learning how you improve over time.
Also Read: Laptop Drawing PC: Top 10 Beasts in the Market
Keep Practicing and Master the Art of Procreate
Improving your art takes practice, and the right Procreate tips and tricks can speed up your progress. As your skills grow, using quality design elements becomes essential. That’s why adding custom fonts for Procreate can really elevate your work.
For professional-grade fonts, check out Creatype Studio. Our server license supports unlimited commercial use, even in apps and user-generated content. Plus, you get lifetime access and marketing rights. Best of all, bulk and franchise discounts make it cost-effective for creative teams. So, secure yours now!

